Noise Dosimetry Study Procedure: Factory Preparation
🌱 Last updated: September 22, 2026
A maintenance worker may spend the morning in a relatively quiet workshop, visit the compressor room and then work beside operating machinery. A noise reading taken at any one of these locations cannot, by itself, describe the worker’s exposure across the day.
A personal noise dosimetry study measures exposure during the worker’s activities. Its usefulness depends on selecting representative work periods, configuring the instrument correctly and documenting what happened during monitoring.
This guide explains the noise dosimetry study procedure, what a factory should prepare and the mistakes that can weaken an assessment.
Quick answer: A personal noise dosimetry study involves defining the objective, selecting workers and monitoring periods, checking and fitting the equipment, recording exposure and activities, validating the data and reporting against a stated criterion. A complete eight-hour measurement is not mandatory in every study; the monitoring strategy must adequately represent the exposure being assessed.
What Is Personal Noise Dosimetry?
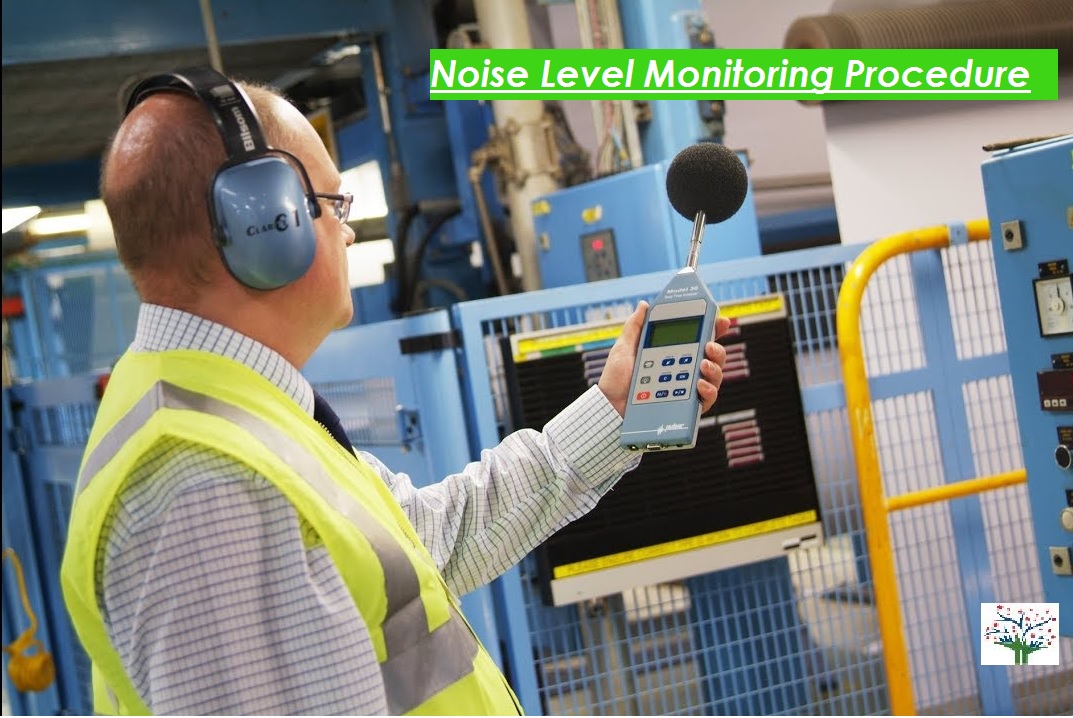
Personal noise dosimetry measures a worker’s noise exposure over time using a wearable instrument called a noise dosimeter.
The microphone is positioned near the ear according to the instrument instructions and measurement method. The worker carries out representative duties while the instrument records exposure.
Begin with the question: “What decision should this study support?”
The answer shapes the sampling plan:
Routine exposure assessment: Capture representative duties and operating conditions for the selected job roles.
Investigation of a particular activity: Identify when the activity occurs, how long it lasts and how often workers perform it.
Assessment after a change: Consider new machinery, revised shifts, increased production or modified controls.
Comparison between shifts: Account for differences in equipment use, staffing and work practices.
Audit or customer requirement: Confirm the requested method, assessment criterion and reporting scope.
A study of routine production may not answer a question about an occasional shutdown task. Both are valid objectives, but they require appropriate planning.
Personal Noise Dosimetry Procedure: Step by Step
Step 1: Understand the Work and Operating Conditions
The assessor and site team should review the processes, job roles, shift patterns and activities that may contribute to exposure.
Useful information includes:
Machinery and processes: Main sources and intermittent operations.
Actual duties: Routine work, cleaning, maintenance and material handling.
Work patterns: Shift length, breaks, rotation and overtime.
Production conditions: Typical loading, batch cycles and unusual activities.
Existing evidence: Previous noise surveys and relevant risk assessments.
Site restrictions: Access, hygiene, hazardous-area and equipment requirements.
A walk-through helps establish whether workers with the same designation actually perform similar work.
Select workers according to their exposure patterns, rather than simply availability.
Workers performing similar tasks under similar conditions may form a group for assessment. However, the same department or designation does not automatically mean the same exposure.
Consider whether workers:
Operate the same machinery.
Spend similar amounts of time near noise sources.
Carry out additional maintenance or cleaning.
Work under different conditions on different shifts.
Change duties between batches or production runs.
The sampling plan should explain the selection and whether additional workers or days are needed. There is no single sample size suitable for every factory.
Step 3: Decide How Long to Monitor
A full eight-hour measurement is not universally required for a reliable assessment. Shorter measurements may be suitable when they adequately represent the relevant activities and follow an appropriate assessment method.
The distinction is between actual recording time and the reference period used to express exposure. An eight-hour reference does not automatically require eight hours of recording.
The appropriate strategy depends on the work:
Work pattern
What the monitoring plan should consider
Repetitive duties with relatively stable exposure
Whether representative samples adequately capture the work cycle
Several tasks with different noise levels
Coverage of each relevant task and reliable duration information
Frequent movement or unpredictable activities
Longer monitoring, potentially covering the full shift
Significant differences between days
Additional monitoring to capture variability
Consider a worker who performs inspections in the morning and grinding in the afternoon. Monitoring only the inspections would not adequately describe the afternoon activity.
Likewise, recording a short noisy task and projecting it across the entire shift could overstate exposure.
Even full-shift monitoring represents the conditions measured that day. It does not automatically capture every production pattern or unusual task.
Step 4: Confirm Equipment Suitability and Settings
Check that the dosimeter is suitable for the assessment and operating environment. Relevant checks include battery capacity, available memory, microphone condition, measurement range and supported outputs.
Where flammable gases, vapours or combustible dust may be present, confirm that the equipment is permitted under the site’s hazardous-area requirements.
The measurement configuration also needs attention:
Setting or parameter
Why it matters
Criterion level and duration
Establish the reference for the selected dose assessment
Exchange rate
Affects how allowable exposure time changes with noise level
Threshold level
Can determine which levels contribute to dose calculation
Frequency weighting
Identifies how frequencies are weighted in the measurement
Logging interval
Determines the detail available in the time history
Measurement range
Helps establish whether relevant levels can be captured without overload
A dose percentage needs its settings and assessment basis to be meaningful. Results obtained using different configurations may not be directly comparable.
Use the settings required by the selected method, rather than assuming the instrument’s previous configuration is appropriate.
Step 5: Perform and Record Field Acoustic Checks
A field acoustic check uses a suitable acoustic calibrator to check the instrument’s response before and after monitoring.
Record the results and assess them against the applicable method and equipment requirements. An unacceptable change needs investigation before the measurement is accepted.
Field acoustic checks complement periodic instrument calibration; they do not replace it.
Maintain identification details for the dosimeter, microphone where applicable and calibrator so that the checks can be traced to the monitoring session.
Step 6: Fit the Dosimeter and Brief the Worker
Position the microphone near the ear according to the instrument instructions and measurement method. Secure the equipment so that it does not obstruct movement, interfere with PPE or create an entanglement risk.
Continue representative duties and normal safety practices.
Avoid touching or covering the microphone.
Avoid deliberately making noise near the instrument.
Report displacement, removal, damage or unusual events.
Continue wearing required hearing protection.
Never ask workers to remove required hearing protection simply because exposure is being measured.
Step 7: Record Exposure and Maintain an Activity Log
Confirm that recording has started, note the start time and check that the instrument clock can be matched to the activity record.
Document meaningful changes in tasks, locations and operating conditions.
Illustrative activity log only; this is not a Perfect Pollucon project record.
Time
Task or location
Observation
09:00–10:30
Packaging line
Normal production
10:30–10:45
Break room
Scheduled break
10:45–12:00
Packaging line
Second line started
12:00–12:20
Utility area
Routine inspection
12:20 onwards
Production floor
Returned to normal duties
An activity log helps explain changes in the recording. Without it, an increase may be difficult to connect with a task, location or interference.
Record breaks and handle them consistently with the assessment plan. Do not pause monitoring merely to reduce the recorded exposure.
Paper or digital logs can be used. Digital records may make matching timestamps and retrieving information easier, but they still require accurate entries and checks. Digitisation does not prevent missing or incorrect data by itself.
Step 8: Document Interruptions and Unusual Events
Examples include microphone contact with clothing, instrument removal, recording failure, unexpected shutdowns and overload indications.
The guiding principle is simple: investigate unusual data, preserve the original record and document decisions.
A high reading should not be deleted simply because it looks unexpected. Equally, an interrupted period should not silently be treated as zero exposure.
Record enough information for the assessor to determine whether the data remain usable or whether qualification or repeat monitoring is necessary.
Step 9: Complete the Measurement and Validate the Recording
At the end of monitoring:
Record the finish time.
Stop and save the session correctly.
Complete the post-measurement acoustic check.
Retrieve the recorded data.
Compare the recording duration with the field notes.
Review the checks, interruptions and validity concerns.
Validation should address two separate questions:
Was the measurement technically usable?
Did it adequately represent the activities being assessed?
A recording can be technically sound yet miss an important task. Conversely, a representative workday can produce unusable data if an equipment problem occurs.
Step 10: Report the Findings and Plan Follow-Up
The report should identify the monitored worker or group, activities, duration, settings and assessment criterion.
Clearly distinguish measured results from projected or calculated values, and explain relevant limitations and uncertainty.
Depending on the findings, follow-up may involve investigating specific sources, assessing engineering controls, reviewing working practices or obtaining additional measurements.
Communicate an immediate concern to the responsible site representative promptly rather than relying solely on the final report.
A Simple Example: Measured Dose vs Projected Dose
The following numbers are fictional and illustrate projection only. They are not a PPS test result or an Indian legal limit.
Suppose a dosimeter records a measured dose of 25% over two hours, using a stated set of dose settings.
If the same exposure pattern continued for eight hours, a simple duration-based projection would be:
Projected eight-hour dose = 25% × (8 ÷ 2) = 100%
This calculation assumes the remaining six hours have the same average rate of dose accumulation.
If those hours instead involve quieter duties, louder tasks or different working conditions, the projection may not represent the actual shift.
The report should therefore distinguish:
Measured result: 25% during the two-hour recording.
Projected result: 100% over eight hours under the stated assumption.
Assessment basis: The instrument settings and criterion defining that percentage.
Under the selected dose convention, 100% represents the reference daily dose. It is not a universal guarantee of safety or a compliance conclusion independent of the applicable criterion.
The lesson is that shorter monitoring can be useful, but extrapolation must be justified by the work pattern.
Factory Preparation Checklist
Before the visit, arrange the following:
Job information: Departments, roles and actual tasks.
Shift details: Working hours, breaks, rotation and overtime.
Production schedule: Relevant batches, machinery and intermittent activities.
Previous records: Noise surveys or exposure assessments.
Access arrangements: Induction, permits and entry timing.
Equipment requirements: Hazardous-area, hygiene and other restrictions.
Site coordinator: A person who can help with task records and communication.
Worker briefing: Explain the purpose and practical requirements.
Assessment specification: Any audit, customer or internal requirement.
Choose conditions that represent the work you need to assess. Do not make operations unusually quiet for the visit.
If production changes unexpectedly, inform the assessor so the sampling plan or report can account for it.
Comparing dose percentages with different settings
Check the assessment basis first
Treating one result as whole-factory certification
Keep conclusions within the sampling scope
Which Standards and Limits Should Be Used?
Identify both the measurement methodology and the criterion used to assess exposure.
ISO 9612:2025 provides a methodology for determining occupational noise exposure and includes consideration of measurement uncertainty. Consult its requirements when that method forms the basis of the study.
Applicable Indian occupational provisions, site-specific obligations and contractual requirements need separate consideration.
CPCB ambient noise limits do not replace personal occupational exposure criteria. International guidance should not automatically be presented as Indian law.
This article explains the planning process. A competent assessor should establish the detailed sampling strategy, settings and interpretation for the facility and assessment objective.
What Should the EHS Team Check in the Report?
Before accepting and filing the report, check that it explains:
Who and what: Worker identifier, job role and monitored activities.
When: Date, recording duration and relevant shift details.
How: Instrument identification, configuration and field-check records.
Assessment basis: Method and criterion used.
Results: Supported measurements and clearly identified projections.
Limitations: Missing activities, unusual conditions and relevant uncertainty.
Follow-up: Findings and recommendations within the study’s scope.
A useful report should explain how its conclusions were reached. A statement that results are “within limits” is not sufficient on its own.
Planning a Study With Perfect Pollucon LLP
Installing new machinery, changing shift patterns or reviewing an existing noise assessment are useful opportunities to examine whether current exposure information still represents the work.
Our Thane-based team supports facilities in Mumbai, Navi Mumbai and surrounding industrial areas. Personal monitoring can also be discussed alongside broader noise level monitoring and testing.
To plan an assessment, contact Perfect Pollucon LLP with your facility location, job roles, shift timings and the question you need the study to answer.
Frequently Asked Questions
Is a complete eight-hour measurement mandatory?
No, not in every assessment. Shorter representative measurements may be appropriate under a suitable method. Variable or unpredictable exposure may require longer monitoring or repeated measurements. An eight-hour reference period is different from eight hours of actual recording.
Can one worker represent an entire department?
Only where the sampling strategy supports that conclusion. Differences in duties, machinery, locations and shifts may require additional workers or monitoring periods.
Should monitoring continue during lunch and tea breaks?
Follow the assessment plan. For continuous full-shift monitoring, breaks generally remain part of the recorded work pattern and should be logged. Do not pause the instrument simply to influence the result.
Can workers continue wearing earplugs or earmuffs?
Yes. Required hearing protection must remain in use. A microphone outside the protector does not directly measure the sound reaching the protected ear.
What happens if the worker removes the dosimeter?
Record when it was removed, where it was placed and what activities occurred during the gap. The assessor can then determine whether the recording needs qualification or repeat monitoring.
Does a high dose result identify the machine responsible?
Not by itself. Task records, time-history data and supplementary source or area measurements may help investigate which activities contributed to exposure.
Does monitoring need to be repeated every year?
There is no single frequency that can be assumed for every facility. Consider applicable requirements, the assessment programme and changes in machinery, production, shifts, tasks or controls.